So it was Thanksgiving in Canada this past weekend. I don’t technically celebrate Thanksgiving in the traditional sense, since I’m brown and my dad’s typical response is, “You should give thanks every day, not just one day of the year!” Can you guess what he says on mother’s day and father’s day? Lol.
Regardless of this, I always seem to start craving all the comfort foods that the cooler weather brings, like pot pies, regular pies, and crumbles. I’m actually not a big fan of pumpkin, even though it seems to be all the rage this season; instead, apple is my go-to fruit in this season.
And so when I had a hankering for an AMAZING apple pie, with a crispy, buttery crust and an ooey-gooey filling, I started scouring the internet for the perfect recipe, one that I could see myself making for years. This ended up taking longer than I anticipated since apparently there are a gazillion ways to make this thing! Some used sour cream in the dough, some used shortening instead of butter, some people commanded you to use Granny Smith apples, and those only, while some recommended a mix of everything under the sun, and then others used cornstarch, while others used flour. It was enough to make my head spin!
I ended up comparing three recipes to get the perfect golden apple pie, and ended up baking two pies (it was research’s sake, of course), so that I could present to you the perfect (in my opinion) apple pie.
Enjoy!
Apple Pie
Crust Ingredients:
As inspired by Simply Recipes
- 2 1/2 cups flour
- 1 tsp sugar
- 1 tsp salt
- 1 cup butter, cubed and kept cold until use
- 6 to 8 tbsp ice cold water
Directions:
- Start by mixing your flour, sugar, and salt in a food processor. After a few pulses, go ahead and add your butter into the mix. Give it another few pulses, or until it’s all crumbly with chunks of butter and flour forming.
- Remove this mixture from the food processor into a bowl, and then start adding the water, one tablespoon at a time. Knead the dough after each addition until it starts to hold its shape, being careful to not add too much water.
- Once the dough is roughly formed, separate it into two smaller rounds of dough. Flatten them a bit and then wrap in plastic wrap. Refrigerate for at least an hour and up to 2 days.
Filling Ingredients:
As inspired by Moms Who Think and Kraft Kitchens
- 6 to 8 cup apples, peeled and cut into slices*
- 2 tbsp lemon juice
- 3/4 cup brown sugar
- 1/4 cup granulated sugar
- 1/4 cup flour
- 1 tsp cinnamon
- 1 tsp nutmeg
Directions:
- Preheat oven to 400 degrees F. Remove the two dough rounds from the fridge at least 15 minutes before they’re needed, and longer if they’ve been in the fridge for longer.
- Start by mixing your apple slices with lemon juice, brown sugar, granulated sugar, and flour. Sprinkle cinnamon and nutmeg on top and then mix again.
- Unwrap the dough and make sure it’s soft enough to be rolled out. Get two large sheets of plastic wrap and place one round of dough in between the sheets and start rolling out. The plastic wrap makes it easier to roll the dough, without having it stick.
- Roll until it’s a few inches bigger than your 9 inch pie plate, and then after peeling one sheet of plastic wrap off, invert the crust onto the bottom of the plate. Make sure it lines the whole bottom and the sides of the pie plate. If there is extra dough hanging off, cut with kitchen scissors and set aside.
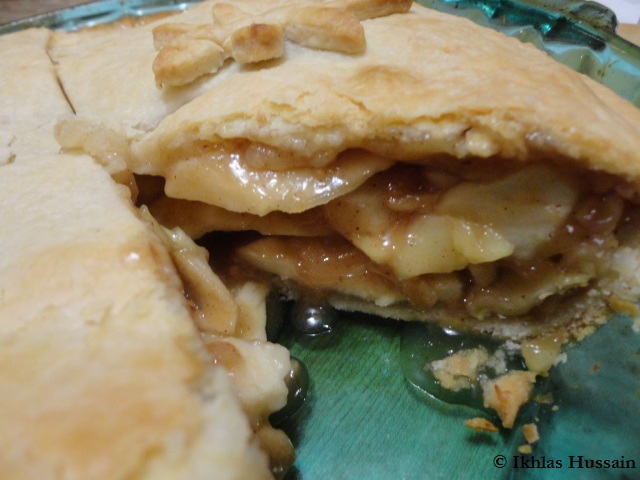
- Remove the second piece of plastic wrap, and fill the plate with your filling, making sure the apples are all evenly distributed. Your filling will look kind of dry, but fret not, it’ll become all ooey-gooey during the baking process.
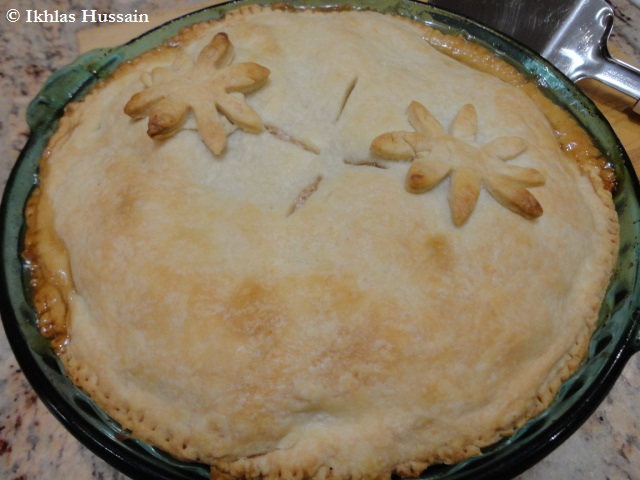
- Roll out the second round of dough following the same method as described in steps 3 and 4, and then trim the excess dough off, keeping it aside. Press the edges of the top crust down so that it meets the side crust, and then use a fork or your finger to create ridges along the rim.
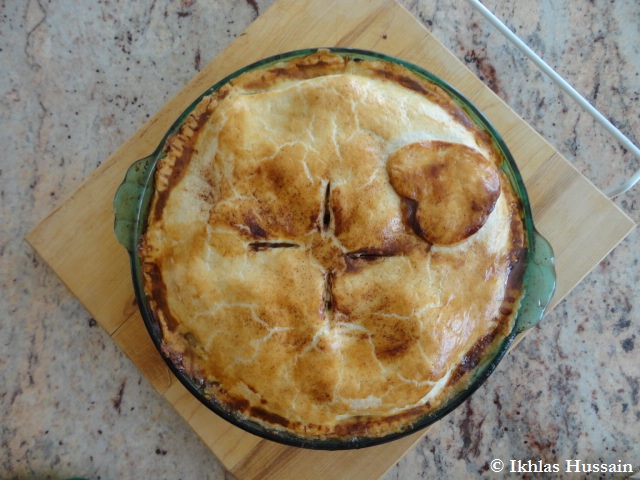
- Cut a few slits in the centre of the pie to allow steam to escape during the baking process. With the excess trimmings of dough, knead them together and then roll it out. Using a cookie cutter, cut out a shape and put onto the top crust as a decorative feature.
- If you want, you can also brush the top with 1 egg yolk, whisked with 1 tbsp milk, and a few sprinkles of cinnamon.
- Bake for 45 to 50 minutes, or until the crust starts to turn golden brown and the juices start to escape from the sides and bubble.
- Let cool, cut and serve.
*A note about the apples: So when I was planning this recipe, I specifically told my dad to buy Granny Smith apples, since that’s what the majority of all recipes called for. As usual, in typical dad fashion, he bought me some other apples which were not tart Granny Smiths. After I had a bit of a tantrum, I ended up using these other sweet apples (Spartan), and even one Royal Gala, since I didn’t have enough. The result was amazing.
The second time I made the exact same recipe, except this time got Granny Smiths. The result was a bit tart and sour, which my family still enjoyed, but I wasn’t such a big fan of. So the moral of the story is: use whichever apples you like! Tart Granny Smiths aren’t the be all, end all for apple pie filling, since I actually enjoyed my pie more with sweeter apples.
Whew! This took me awhile to write (and to make), but honestly, it’s not a hard recipe, just one that requires a lot of steps. That’s why it’s easier to break it down into chunks. I made the dough in the morning, and then started assembling at night.
Another tip: don’t start assembling your filling until your dough is almost ready to be rolled out. The first time I made the pie, I didn’t give myself enough time, and was sitting with my filling, still waiting for the dough to soften enough to roll out. So give yourself lots of time during the preparation.
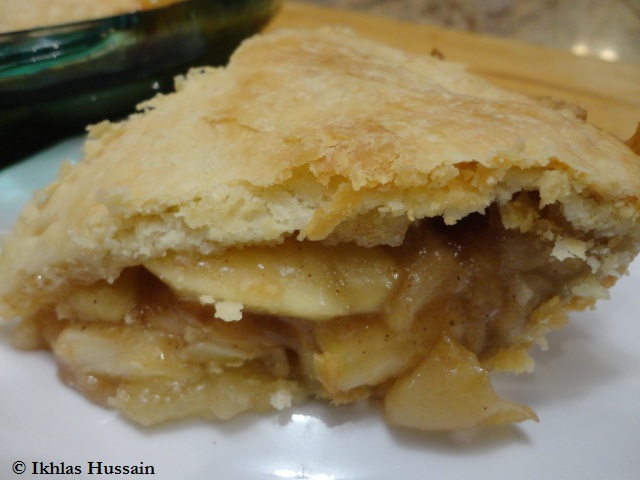
Despite the long time that this recipe took to make, it didn’t rival the pure childlike delight I had as I watched it bake through the oven window, nor the giddy excitement as I stood at the kitchen island, impatiently waiting for it to cool down enough to dive into, nor the pat on the back I received from my dad, who doesn’t really enjoy my M&M studded, chocolate chip littered desserts, nor the taste of of the golden, crispy and buttery crust, with the ooey-gooey apple filling, dotted with spicy cinnamon and nutmeg, swirled with a dollop of creamy vanilla ice cream.
It was so good there was none left the next day!
Anyway, if you do try this recipe out, let me know how you get on! I promise it’s not as daunting as it appears 🙂
Thanks for reading,
Ikhlas


Hey! So the rule of cooking with apples (and wine, actually) is that if you like it raw, you’ll love it baked. The opposite is true as well, of course. Just keep in mind that sweeter apples require less added sugar and tart apples will usually ask for a bit extra. Pretty simple – really! 🙂
Thanks for the tip, Lauren!